Arrows predate all recorded history and were common to most cultures which means they have been made for many centuries using only organic materials. It is archery itself and the choice of materials and craft techniques used that interested me in having a go at fletching (arrow making). My experience is extremely limited as this is the first set of arrows I have attempted to make from scratch. A bit of research soon told me that there was a lot more to it that one would expect, I decided to dispense with the finer technicalities and concentrate on just the basic principles.
I had to taper the tips of the pine shafts for the fitting of the points (piles) and have chosen a set of steel piles similar to those used during the medieval period for target practice. I decided against broadhead tips as these are only practical for war and hunting. Bullet shaped target points are designed to penetrate target butts easily without causing excessive damage.
Keeping with tradition, goose and turkey are the feathers of choice for the conventional three-feather fletchings. The arrows fletchings provide the drag required to stabilize the arrow's flight. It is important to use three feathers from the same wing as a bird's wing feathers are handed with a slight curve.
Three feathers used from the same wing will give the arrow some spin, which also improves accuracy. If you mix left and right wing feathers, your arrow will not fly true. The image above shows the feathers cut to shape. There is a wide possibility of shapes and sizes, each with different effects on flight. I have chosen to stick with a size and shape that ties in with the arrows overall medieval period.
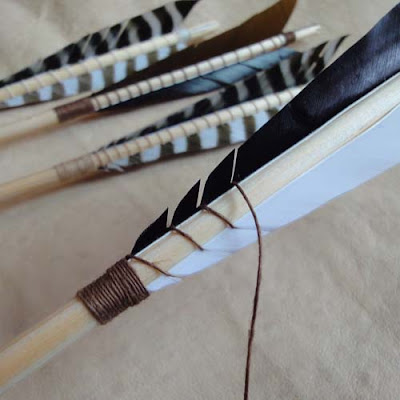
The positioning of the feathers is as far back towards the nock as is comfortably possible and I've taken care to line them correctly with the nock's slot. After tacking the feathers in place, it is time for the final binding which will hold the the feather firmly to the shaft. I have used a fine linen mostly and also hemp for the binding. (shown in the photo below)
With a completed set of 12 arrows, some kind of quiver was required to keep them together. I decided to make a simple tubular design from giant Himalayan nettle, buffalo leather and a touch of red squirrel pelt. The nettle fabric is truly organic as it grows wild and is harvested, retted, spun and then woven in the remote Himalayas much in the same way that it has been for centuries. The buffalo leather also comes from Nepalese villages.
The completed quiver of 12 arrows shown below.


.jpg)
.jpg)